Showing posts with label chicken. Show all posts

Thursday, April 19, 2012


Week Night Dinner: Chicken Piccata


Week Night Dinner: Chicken Picatta
So easy, so delicious and made with just a few simple ingredients. I served it with pasta as the extra sauce goes perfectly with it. We had a salad as a final course. I buy boneless breasts on sale and freeze. I  always have  lemons and capers on hand. and of course you can do this with veal or pork cutlets too.

INGREDIENTS

  • 2 large boneless, skinless chicken breast halves
  • 1 cup Parmesan cheese
  • 1/2 cup flour
  • garlic salt
  • fresh cracked pepper
  • crushed red pepper to taste
  • 4 Tbsp olive oil
  • 6 Tbsp butter
  • 1/2 dry white wine or dry vermouth
  • 3 Tbsp lemon juice (I used Meyer)
  • 1/2 cup brined capers
  • 1/4 cup fresh chopped parsley
METHOD
  • Put the chicken breasts between two pieces of waxed paper and pound them with a meat hammer to about 1/4-inch thickness. Cut them up into pieces a little smaller than the palm of your hand.
  • Put the cheese and a bit of parsley into a mini processor and process till the cheese is about the size of couscous.
  • Mix together  flour, salt, peppers, and grated Parmesan.  Dredge the chicken in the flour mixture, until well coated. *Note some people like a thicker coating, if you do dredge in plain flour first, then in an egg wash and finally in the cheese and flour mixture. I like mine lightly breaded.
  •  Heat olive oil and butter in a large skillet on medium high heat. Add half of the chicken pieces, do not crowd the pan. Brown well on each side, about 3 minutes per side. Remove the chicken from the pan and reserve to an oven proof pan. Place in a warming drawer or a 300 degree oven. Cook the remaining chicken pieces,  remove from pan. Keep warm in the oven while you prepare the sauce.
  • On medium/low heat. Add the wine & lemon juice to the pan and stir to deglaze and loosen. Add capers to the pan. Reduce the sauce by half.
  • Plate the chicken and serve with the sauce poured over the chicken. Garnish with remaining parsley. Use extra sauce on pasta and toss.
  • If you have left over breading, you can toast it on a silpat and use it as a topping for other things.

Monday, September 5, 2011

Best Fried Chicken French Laundry Style

Thomas Keller of the French Laundry  fame serves this chicken at Ad Hoc every Tuesday. This is quite simply the best fried chicken ever. I have tweaked it a bit from the original recipe after making it a few times. Less bay leaves, added peppers, fresh turmeric, honey in the buttermilk and some other changes. The brine maintains texture and flavors the chicken. It is delicious hot or cold. The buttermilk and honey impart a tang and sweetness. The coating fries perfectly if you maintain the temperature of the oil. 
You need to start this ahead of time, it takes two days to make. The first 24 hours is brining in the refrigerator, but the active time for frying the chicken is no longer than any other recipe of fried chicken.    

In my house it is for special occasions, as each piece is about 500-700 calories depending on if you eat the skin (and WHY wouldn't you?). 
For the Brine: 
1 gallon water
1c kosher salt
1/2cup of honey
1/2 cup raw sugar

2 bay leaves
2 heads of garlic cut in half
¼ cup yellow mustard seeds
1 finger of fresh turmeric grated (2 Tablespoons of ground turmeric if you cannot find fresh)

1 small hand full of whole black peppercorns
2 large stalks of lemon grass bruised

5 large rosemary sprigs
1 bunch thyme
1 bunch parsley
Zest, juice and rind of 3 Meyer lemons 
5 habanero chiles cut in half
4-6 # of chicken parts (Split breasts are quite large these days, so if you find yours extra large, use a cleaver and cut each breast in half)

For Frying:
6c flour
3T garlic salt
5T onion powder
2 T paprika
4t cayenne
1T fresh black pepper
2t kosher salt (I use smoked Hawaiian salt)
6c buttermilk
12c peanut oil (or freshly rendered lard)


Method:
Place all of the brine ingredients in a large pot and heat till the sugar and honey melt. Remove from stove and allow to cool. To speed this process up, you can use ¾ gallon of water and then add 4 cups of ice cubes after cooking.

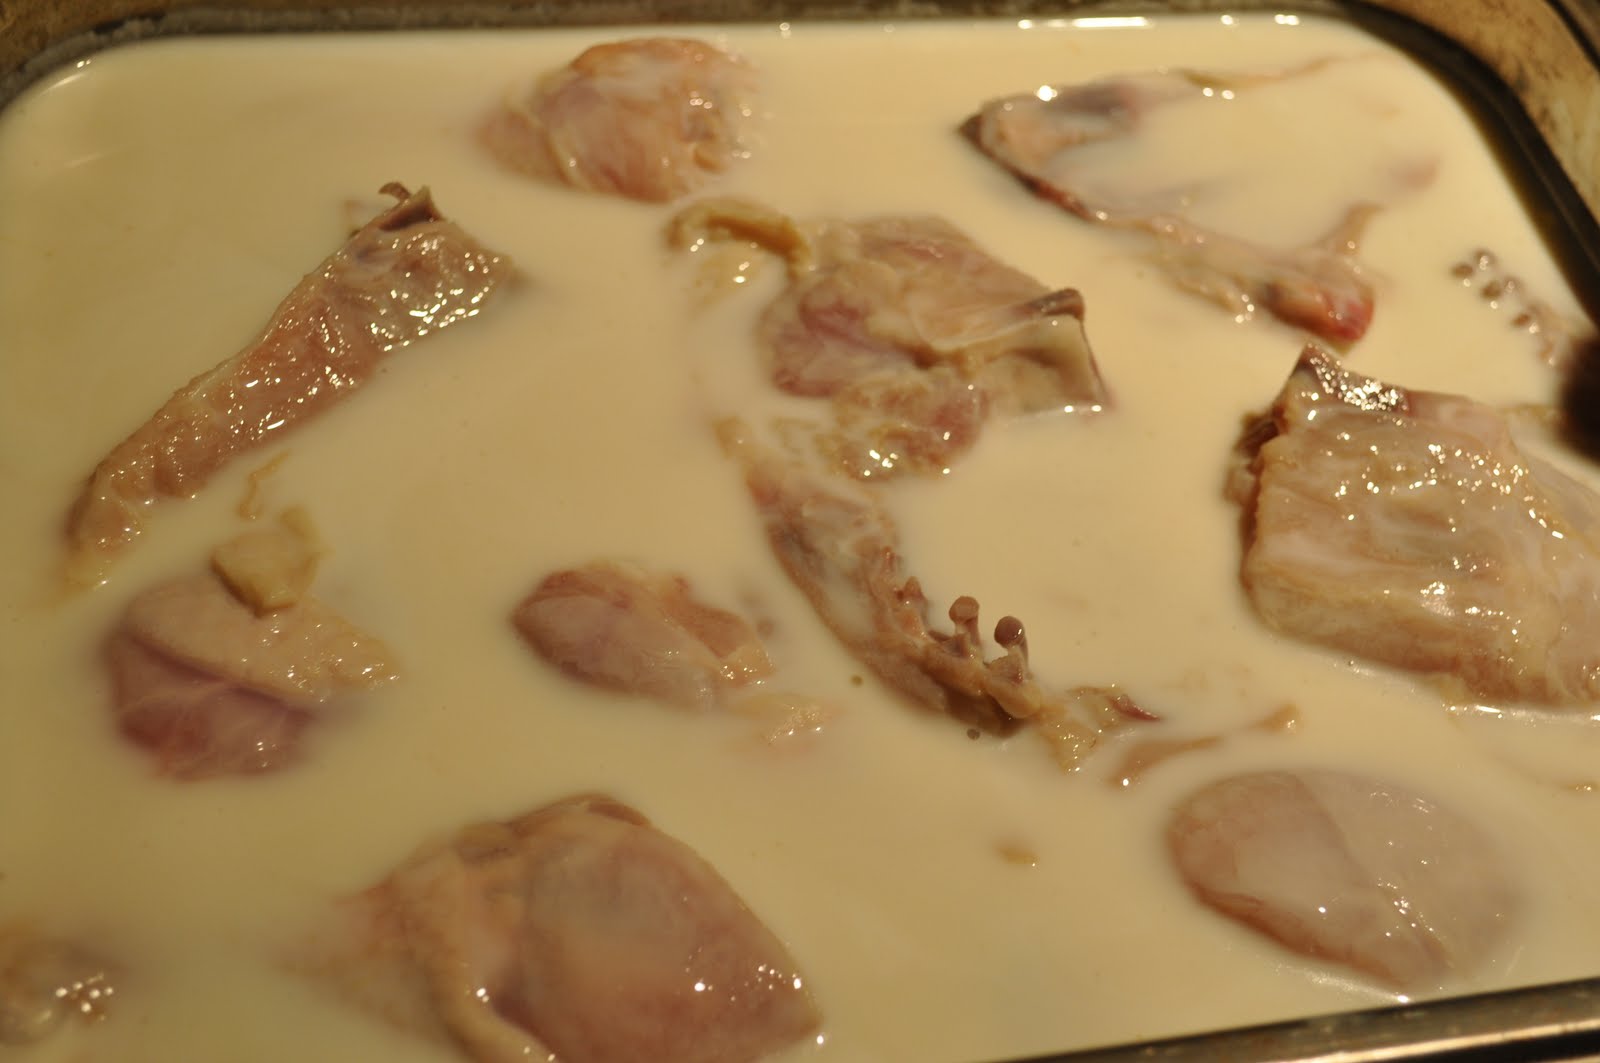
When completely cool add chicken parts. Refrigerate for 12-24 hours.

Mix together the honey and buttermilk.

Remove the chicken from the brine and pat dry with paper towels
Add to the honey and buttermilk and allow to soak for at least one hour and up to 12 hours.

Heat the oil/lard in a very large deep pot to 300˚, try to maintain this heat during cooking, do not let the oil get too hot.

Mix together the flour and seasonings in a large pan.

One piece at a time, take each chicken piece out of the buttermilk mixture, coat with flour, shake off excess and then dunk again in the buttermilk and coat again in flour. 

Set the chicken pieces on a large baking sheet lined with waxed paper. Allow the chicken to sit at room temperature for 30 minutes to one hour. 
Start frying, two to three pieces at a time, do not crowd the chicken. It would be even better to do it one piece at a time so the oil maintains the 300˚ temperature, but that is time consuming. Use a candy thermometer to maintain the temperature as close to 300˚ as possible. When the chicken is golden brown (about 12 minutes for legs and thighs, 7 minutes for ½ breasts) use an instant read thermometer to check doneness. It should read 160 ˚. Remove and place on a sheet pan in a warming oven no warmer than 120 degrees.


Serve while warm. 

Sunday, September 26, 2010

Grilled Tequila Lime Chicken & Ohelo Berry Sauce

Grilled Tequila Lime Chicken with Ohelo Berry & Pineapple Sauce

I have been working on some Ohelo Berry ideas for the USDA. They are experimenting with growing them as a crop for the first time. This is one of many recipes that I developed using the ohelo berry. Unless you live in Hawaii, you are out of luck for sourcing this berry. It grows wild in mid-high elevations here. It is much like a cross between a cranberry and a currant. It has a slight tangy taste with sweet after notes, but does not  have a huge stand alone flavor on it's own. Thanks to Nancy Botticelli of Waimea for providing me with an abundance of her beautiful limes to play with too. 

Marinade: 
1/2 cup tequilla
1/2 cup lime juice
1/2 cup of honey slightly heated

4-6 Boneless Chicken Breasts or thighs. 

Sauce: 
1/4 cup finely diced shallots
1 tablespoon olive oil
1/2 cup of reserved marinade with 1 tablespoon cornstarch stirred in
1/2 cup grilled pineapple cut into medium dice (about the size of the berries.) 
1/2 cup Ohelo Berries (whole)

Marinate chicken in the marinade for 30-45 minutes (no more or the lime will start breaking down the chicken.)

Remove chicken from the marinade and prepare the sauce by adding all ingredients and cooking on low heat till slightly thickened. Keep out the Ohelo Berries till just before serving to maintain color and texture. 

Grill the chicken and then serve with the sauce. 

Tuesday, February 9, 2010

Tamale Time!

As promised, I am giving you the recipe for tamales. The masa or dough is my basic and most favorite masa, made with fresh corn. I also rendered my own lard. You can see step by step instructions for rendering lard here. The fillings and wrappings can vary greatly in style as well as ingredients. I used dried corn husks that had been soaked for a few hours in hot water. You can also use fresh or frozen banana leaves or Ti leaves but they will need to be softened briefly on a grill so that they will bend but not break. I used lengths of cotton cooking string and strips of the corn husks to tie the tamales, but there are versions that are made folded and not tied at all.

A variety of condiments or sauces can be served with tamales. In this case I opted for a New Mexico style chile sauce which is extremely simple to make. All you have to do is take dried New Mexico Chiles or California Chiles (these are the Anaheim or simular varieties, mild in flavor). Remove the stems, then the seeds and toast slightly on a griddle. Soak in boiling water for 1 hour. Remove from the water and place in a blender with just about 1/4 cup of the liquid or chicken stock and puree completely. Then strain with a food mill or sieve. This sauce will keep for up to two weeks in the refrigerator and also freezes well.

For this session of tamale making, I wanted finger food, so I made the tamales as small as I could. That is not an easy task if you are using a filling. Some tamales such as Cuban tamales are made with all the ingredients included in the masa, therefore they would be much easier to make small.

Basic Fresh Corn Masa

  • Fresh corn cut from 10 ears of corn or good quality frozen corn either way you need about 4 cups of corn. 
  • 4 cups of Masa para Tamales this is a dry masa available in the flour section of most any grocery store. Do not get masa para tortillas, which is an instant tortilla masa. 
  • 1/4 cup sugar
  • 2 teaspoons baking soda
  • 1 teaspoon salt
  • 2 cups of fresh rendered lard. If you do not want to make your own lard, you may be able to find it at the butcher counter of most Hispanic markets ask for manteca. DO NOT buy packaged hydrogenated lard in the baking section. We don't have Hispanic markets in Hawaii, so making our own is pretty much the only option. Read the article on rendering lard for more information about lard vs shortening. For those of you that are lard-phobic or on very restricted diets, there are other options of course butter being the next best and after that any vegetable shortening that has not been hydrogenated. Do not use oil as it will change the texture completely. 
  • 1/2 to 3/4 cup of chicken stock. I made stock when I cooked the chicken thighs for the filling. But if you don't make stock, boxed stock is fine, just look for organic lower sodium stock. 
*I also added some chile powder to one of my masa recipes just to add some variety in color. 

Method: 
  • Place the corn kernels in a food processor w/steel blade and pulse till it is roughly chopped up. This should only take 4-5 pulses. Add the masa, the baking soda, salt and sugar and just pulse a few more times to mix. 
  • In a mixing bowl or a clean food processor bowl beat the lard till it is light and fluffy. 
  • Mix both batches of ingredients together in a large bowl. If your food processor is large enough, that is fine, otherwise stir very well until the masa is well incorporated. Add as much stock as it takes to make a very moist but firm dough. You should be able to roll it into a soft ball. Make it as moist as you can while still being able to roll into a ball, This is crucial for having moist tamales. Cover and let rest at least 30 minutes before using.
  • The masa can be made ahead and refrigerated, but allow it to come back to room temperature before using. 

Fillings: 

I made two filings and there are endless combinations. 


Queso Blanco and Green Chile Filling
  • Roast 6 large green chiles (poblano or anaheim) on a grill, place in plastic bag to steam for 15 minutes and then remove the skin, stems and seeds. Cut into 2-3 inch slices about 1/2 inch wide. If you cannot find fresh chiles, you can use canned chiles (not jalapenos) .
  • Queso Blanco or Jack cheese cut into small fingers 2-3 inches long and about 1/2 inch wide
Chicken and Cheddar with Caramelized Onions Filling
  • About 1-2 cups of cooked chicken
  • Caramelized Onions: 2 whole onions rough chopped cooked down in olive oil till caramelized 
  • Sharp Cheddar Cheese cut into 2-3 inch fingers 
Assembly: 
  • Take about 2 tablespoons of masa and put into the center of a wet corn husk. Using wet hands (the dough will not stick) pat it down about 1/4 of an inch thick, making a rectangle at least 3 inches wide and about 5 inches tall. Put the filling in the center. 
  • Using the side of the corn husk nearest you pull the husk up and over the filling to the edge of where the filling ends and pull in as you would do in making sushi maki, to complete the roll. The dough should not be sticking to the corn husk.and it should be covering the filling. You can then roll or fold the corn husk around the tamal and secure with string or husk ties.  

Cooking:

In a steamer or large pot with a folding steam basket, add enough water to cover the bottom but not too much so that the tamales are not sitting in water. Add tamales and cover. Heat water to a gentle boil and maintain the boil (and water level) for about an hour. I use about two or three layers of tamales, small batches are best. Since this is a labor intensive endeavor, I tend to make extra tamales and freeze them. Just pop them from the freezer to the microwave  or thaw and steam later. 
If you liked this post, you might also like these recent posts on Mexican Cooking in Hawaii: 

Sunday, December 13, 2009

Hilo Turkey Mole


I am still not sick of turkey! I have another one in the smoker right now. Meanwhile, one of the reasons I am not tired of turkey is that there are so many things to do with it that are far beyond the norm. One of my favorite treatments is Turkey Mole. I made a deep dark rich chocolate & spice laden version with a variety of red chiles. I have been using it with turkey breast meat and served on home made tortillas with sides of black beans and tostones (double fried green plantains.)

When I studied cooking in Mexico, one of the many classes was on a variety of Moles. Many regions in Mexico have their own Mole styles, probably the most famous being Oaxaca, where more than 15 mole styles prevail. Basically a mole is a deep and complex sauce used to surround foods like tamales, turkey, chicken, enchiladas and pork. In the huge Central Market of Cuernavaca (the capitol of the region of Morelos) where I studied, there were always mole vendors who sold huge mounds of mole paste concentrates which when mixed with broth created the lovely complex dishes with ease.

We are not so lucky in Hawaii, or most places on the mainland for that matter.  Actually most hispanic ingredients are among the difficult things to find here. Fortunately my friends at Emma's, a small taqueria in an industrial park here supply me with good quality  dried chiles, freshly made tortillas, masa and other ingredients which are otherwise difficult to find here. Many of the other ingredients, such as the pumpkin seeds can be found at our local health food stores such as Island Naturals and Abundant Life Natural Foods. I used both Hawaiian Chocolate and Mexican Chocolate as well as cinnamon from my own cinnamon trees and many spices grown here on the island.


So, here is the recipe. This formula can be used as a sauce for many things and once made keeps well in the refrigerator for up to a month. I do things like render my own lard ahead of time. If you live in an area with a Mexican Butcher or grocery, they probably sell fresh lard there. Do not buy the hydrogenated versions. I urge you to make your own if that is all you can find. Freshly rendered lard is surprisingly healthy for you.. read up on it!


Mole Negro/Pablano

This recipe makes about 2 quarts

12 whole peppercorns ( I use a mix of red, green and black)
6 whole cloves
four 4" pieces of cinnamon (aka canela)
3 tablespoons dried Mexican Oregano
Equal amounts of dried  Poblano, Negro and Guajillo chiles to equal one pound (California and New Mexican Chiles can also be used in the mix)
1 cup of freshly rendered lard
1 cup of pumpkin seeds toasted
1/2 cup of toasted sesame seeds
1/2 cup blanched almonds
1/2 cup pecan or walnut pieces (roasted)
1/2 cup peanuts (roasted)
1 large roll of bread, made into crumbs in a food processor
2 cups dry sherry
1/2 cup dried pineapple chopped
1 cup dried apricots chopped
1/2 cup golden raisins
1/2 cup chopped dried citron (or use any other dried candied fruit)
4-5 cups turkey or chicken stock (home made is best, boxed organic is next best)
2 ripe plantains

4-6 Roma tomatoes
6 serrano chiles
2-3 onions (I use red onions)
1 head of garlic divided into cloves
Take the above ingredients and roast on a grill and reserve


1 cup of chocolate (I use a combination of Mexican and dark chocolate)

In a heavy skillet toast the spices, stir constantly.

Grind all toasted spices in a spice grinder or coffee grinder.

Remove the tops from the chilies and toss seeds.

On high heat, toast chiles. Once all are toasted, place in a bowl and add boiling water. Allow to stand and soften for 1 hour, weight down if needed with a plate and heavy object.

Put some lard in a pan and toast the nuts, then drain and reserve for the plantain. Add bread crumbs and sherry.

In a food processor, grind the toasted spices and nuts.


Heat the sherry and add raisins, apricots and dried fruit. Simmer for 10 minutes and then turn off heat and let stand for 30 minutes.

Heat the remaining lard and cook the plantain. Add to the sauce.


Drain the dried chiles and working in batches, puree with the seeds, grilled veggies and stock. Use a food mill, sieve or chinois to strain any large pieces out. Place all of this in a large dutch oven and add the chocolate stirring and making sure that the flavors have time to blend. Save the sauce for various applications. It freezes well.