Showing posts with label focaccia. Show all posts

Thursday, January 31, 2013

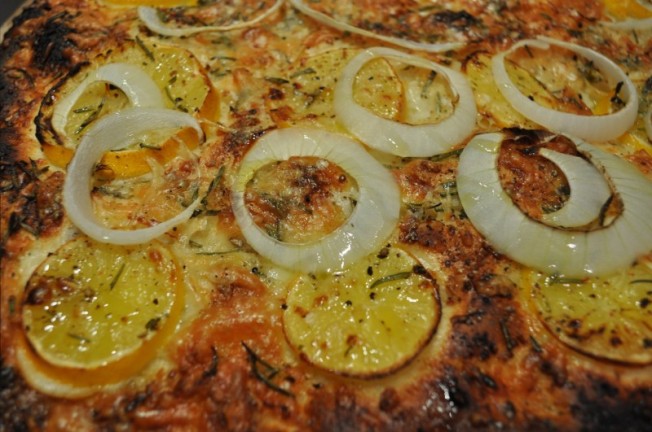
Lemon Focaccia


baked
It is Meyer Lemon season. I have been in love with Meyer Lemons since I was a little girl. My great grandmother had an ever bearing Meyer. Coming from a citrus family has advantages. I wonder how that 60+ year old tree in Glendora, California  is doing now. I do lots with the lemons on my tree and those I buy to supplement my habit. Here is what I did with some of them yesterday.
Meyer Lemon Focaccia
Ingredients:
Makes 1 focaccia.
  • 1 package (1/4 ounce) instant yeast or 2 1/2 teaspoons if you use bulk
  • 5 cups all-purpose flour, preferably organic
  • 2 1/2 teaspoons sea salt
  • Olive oil, for bowl and baking sheet
  • 1/2 cup mozzarella or pecorino toscano thinly shredded
  • 2 lemons, very thinly sliced crosswise
  • about a tablespoon of fresh rosemary
  • 1-2 meyer lemons sliced thinly and seeded
  • Parmigiano Reggiano cheese to grate over the top
  • 1/4 teaspoon crushed red pepper (more if you like a kick)
  • thinly sliced sweet onion
3-4 tablespoons extra-virgin olive oil (I use smoked)
*Note: It is best to use very fresh lemons for this, as older lemons rinds become difficult to chew.
232323232-fp54384-nu=5376-63;-252-WSNRCG=3489553;72343nu0mrj
Method:
  1. In a large bowl, or in a bowl of a stand mixer, combine yeast and 2 1/2 cups flour with 2 cups water; whisk to combine. Let stand 15 minutes.
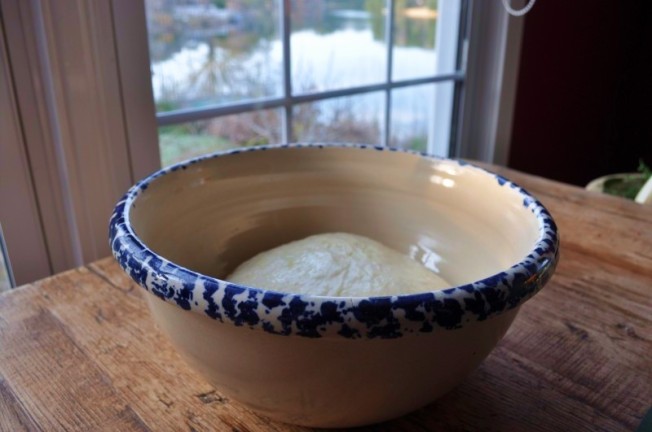
  2. Add remaining 2 1/2 cups flour and salt; mix until well combined. Change to the dough hook if using a stand mixer. If using the mixer, knead with the mixer. If doing by hand, turn dough out onto a lightly floured work surface; knead until wet and tacky, but not sticky, 8 to 10 minutes. Transfer to a well-oiled bowl and cover with plastic wrap. Let stand until doubled in size, 3 1/2 to 4 hours.
    rusung
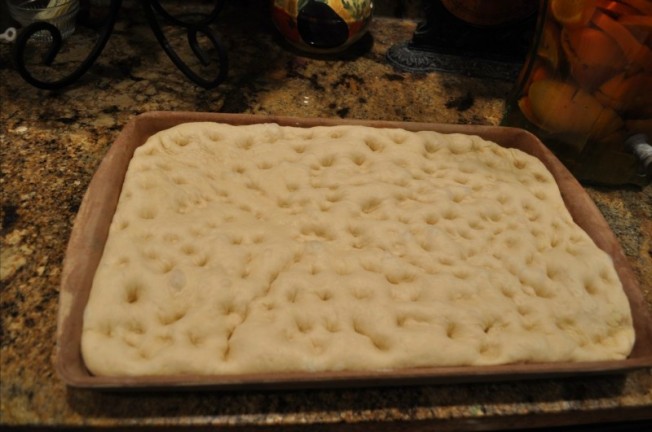
  3. Scatter semolina on a large rimmed baking sheet and press dough evenly into baking sheet. Let rise until puffy, about 1 hour.
  4. Preheat oven to 500 degrees.
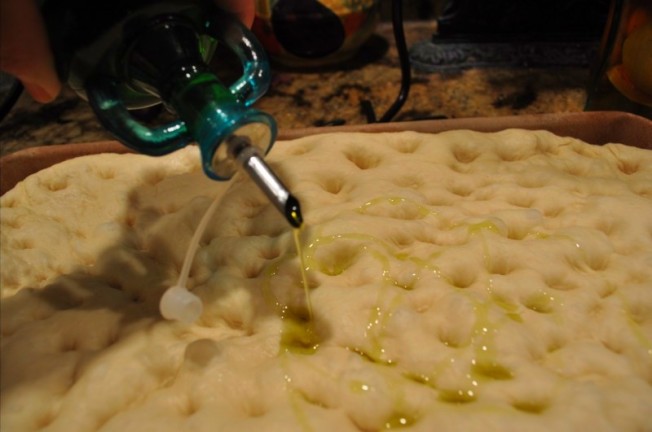
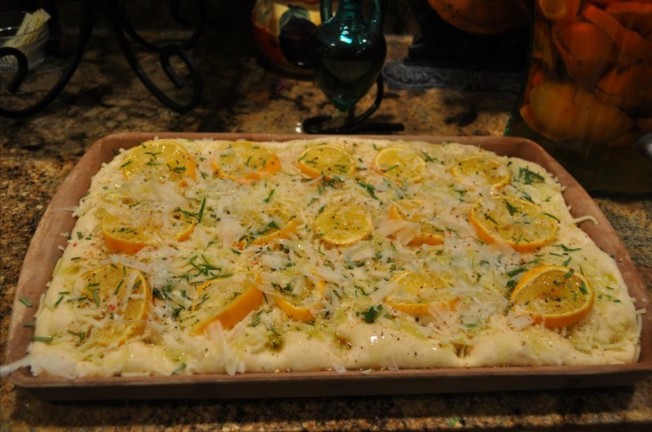
  5. “Dimple the dough with your fingers  Drizzle some olive oil on the dough. Cover dough lightly with Pecorino or Mozzarella  and lemon slices, then sprinkle with rosemary and pepper; drizzle with more extra-virgin olive oil. Gate a little Parm over the top.
    dimplesoiled
  6. Transfer to oven and bake for 15 minutes. Rotate baking sheet, and continue baking until lemons and crust are golden brown, about 15 minutes more.
    ready to bake
  7. Remove bread from baking sheet and transfer to a wire rack to cool at least 10 minutes before serving.
    baked 2

Sunday, June 13, 2010

Pain à l'ancienne: A perfect rustic bread


From The Bread Baker's Apprentice by Peter Reinhart which I have been baking from for a year now, comes pain à l'ancienne, a truly lovely bread, full of texture, delightful crumb and flavor. The secret to this bread comes in the careful handling and retarding the fermenting in a refrigerator. The dough is a wet one and not easy to shape. If you try to shape it much, you will lose the characteristic holes made by the gasses in the bread. It can however be formed into baguettes, focaccia, pizza, ciabatta, pugliese, stirao & pain rustique, all of which are favorite breads of mine. In this case I did baguettes, but I plan to use this formula over and over again in different ways. 


I have been involved with a group of food bloggers doing the Bread Bakers Apprentice Challenge for the last year. It was started when one of my favorite food bloogers, Nicole from Pinch My Salt started the challenge. The goal is to bake through the book, one formula at a time, usually once a week. This formula can be found on page 191 of the book. Mr, Reinhart explains a few important things about this bread: 


"The unique delayed-fermentation method, which depends on ice-cold water, releases flavors trapped in flour in a way different from the more traditional twelve-stage method. The final product has a natural sweetness and a nut-like character that is distinct from breads made with exactly the same ingredients but fermented in by the standard method, even with large percentages of pre-ferment. 


This bread shows us another way to manipulate time, and thus outcomes, by manipulating temperature. The cold mixing and fermentation cycles delay the activation of the yeast until after the amylase enzymes have begun their work of breaking out sugar from starch. When the dough is brought to room temperature, and the yeast wakes up and begins feasting, it feeds on sugars that weren't there the day before. Because the yeast has converted less of the released sugar to alcohol and carbon dioxide, a reserve of sugar remains in the fermented dough to flavor it and caramelize the crust during the baking cycle. While this delayed fermentation method does not work for every dough (especially those that are enriched with sugar and other flavor infusing ingredients,) used appropriately, it evokes the fullness of flavor from the wheat beyond any other fermentation method I've encountered." 


The actual method is simple, it takes two days, like most of Mr. Reinhart's formulas, but really, the actual time it takes to make these loaves is minimal. 


6 cups of bread flour are combined with salt, yeast and then ice water. The dough is then immediately placed in an oiled bowl in the refrigerator overnight. The next day the dough has still not doubled in size and it is removed from the refrigerator and allowed to finish the ferment for another 2-3 hours. Once it has developed, then it is carefully placed on a floured counter and cut into the sizes needed for whatever shapes you are making. In this case I cut the dough in half, from one half I made three thinner baguettes and with the other half larger sandwich size baguettes. 
I turned two sheet pans upside down and coated with cornmeal, then placed the cut and formed baguettes on them. 
The dough does not have a second rise at this point, just a rest of 5-10 minutes. It is then hearth baked directly on the hearth stone on parchment with some cornmeal to keep it from sticking, I used a peel to slide the dough on the parch
3 ment to the bottom of the hearth. Steam is incorporated by both a steam pan and spraying the inside of the oven with water. 

Monday, September 28, 2009

Ah Focaccia!


For the Bread Baker's Apprentice Challenge, I made Focaccia yesterday. Focaccia is a flat bread, but not as flat as a tortilla or nan. Focaccia comes to us from Luguria Italy, also where lovely ravioli got it's start. It is a lovely light airy flat bread, which usually has one or more toppings and lots of olive oil. However, toppings can never make up for an inadequate crust. The bread should have lots of big translucent holes. A proper focaccia can not be made quickly or by machine. It is a dough that takes fermentation and at least two days to make. It needs to be handled gently and folded over a few times for best results. I made mine with herb oil, sun dried tomatoes, porcini mushrooms and calamata olives with fresh mozzarella.

You can make your own mozzarella. I have done it and it is very simple. This video is a clear example of how to make your own. It is best if you can find unpasteurized or at least organic milk, avoid ultra pasteurized milk though.


I began by making a poolish, a very wet lightly fermented starter. It can be made a day or more ahead of time. I like to keep some poolish or biga on hand so that when I want to make bread, it is at the ready. Poolish is more liquid and has less yeast in it than Biga. We used a Biga when making the Italian Bread last week.


After fermenting the poolish for two days I made the focaccia by mixing the poolish and other ingredients in the Kitchen Aid until the dough formed a ball but still stuck to the bottom of the bowl. This is key in making a bread like focaccia or cibata, the dough must remain very wet, but still firm enough to be formed. It is a fine line which really makes a difference in this bread.


Once the dough has been sufficiently kneaded, it is formed into a rectangle and set to rest on the counter. This relaxing period is also crucial. Then twice the dough is stretched and re-folded and then set to rest covered for 30 minutes on the counter. The third time you allow the dough to rise for one hour.

The dough is then placed on a baking sheet lined with an oiled silpat (that is what I used) or parchment paper. I think if you are using parchment you need a little more olive oil. You use your fingertips and a generous amount of herb oil to shape the focaccia. You will see a this point how important the very soft hydrated dough is. You want to degas the bread in some places, but not all over. This is what creates the large holes in the bread.


Reconstitute Porcinis and drain, then chop


Making the herb oil... like my herb cutting scissors? 12 blades!

So, now you have a large flat dimpled bread covered with herbs and oil. You can choose to bake it just like that and it will be fantastic. You can also add toppings. Here is the key:
  • Pre-Proof toppings would be added now, these are things that are sturdy and benefit being incorporated into the dough. This would be things like sun-dried tomatoes; olives; pine nuts sauteed mushrooms or peppers or onions.
  • Pre-bake toppings are added after the dough has risen but before baking, these are things that are higher in moisture such as high moisture cheeses like fresh mozzarealla, blue cheese or feta, cooked ground meat or meat strips. Also coarse salt or sugar.
  • During-Bake toppings would be dry or semi-hard cheeses, such as Parmesan, Romano, Mozzarella, Jack, Cheddar or Swiss cheeses added about half way through the baking.

From here, the final rise begins. It takes about 2 hours loosely covered with plastic wrap. The oven is pre-heated to 500 degrees. A few minutes before baking, more herb oil is added if desired and pre-bake toppings are also added. Then the bread goes in! When the bread is put into the oven, the temp goes down to 450. Bake for 10 minutes, turn 180 degrees, bake for 5-10 more minutes till the dough is golden brown and the internal temperature of the bread is about 200 degrees measured in the center.


Remove from the oven and place onto a rack to cool. As tempting as it is, wait about 20 minutes before cutting and serving.


Want the whole recipe? Buy Peter Reinhart's book, The Bread Baker's Apprentice!