Showing posts with label food. Show all posts

Tuesday, July 23, 2013

Carolina Peach Pie

Carolina Peach Pie

Standard
Peach Pie
Peach Season is here! Nothing can compare to peaches grown in South Carolina and Georgia and this is the time of year when they are at their peak. Beautiful soft orbs of sweet juicy fruit, which are naturally bright and beautiful can be utilized in many ways. I grill them, make chutney, jam them, eat in hand, freeze at least 20# to use for winter and of course make peach pies among other things. This pie is one of my favorites, the other style is a glazed peach pie, which I will be making soon. This one is so easy and delicious.
Carolina Peach Pie
1 recipe of pie dough for a double crust pie
10-12 large ripe peaches
2 tablespoons lemon juice
1 cup of sugar
5 grinds of TSTE Baker’s Secret (cocoa nibs, vanilla turbinado sugar, cinnamon, maple syrup granules, ginger, nutmeg)
1/4 cup of all purpose flour
1/4 cup (1/2 stick) of butter cut into slivers
2 tablespoons of TSTE Coconut Sugar or extra fine white sugar
1 egg beaten with a teaspoon of water
Pre-heat oven to 400 degrees
Peach Pie for the ready
Make an x in the bottom of the peaches, dunk in boiling water for 5 seconds and immediately plunge into ice water. Using a paring knife, pull off the skins. Cut the peaches into bite size pieces and layer with lemon juice sugar as you cut. When all of the peaches are sliced, stir and let sit for 10 minutes while you roll out the crust.
  • Using a spoon, pour off excess juice. Stir in the flour and Baker’s Secret.
  • Pile the peaches into the bottom crust so that the peaches are mounded high.
  • Add slivers of butter all around the peaches.
  • Put the top crust on.
  • Brush on the egg wash, covering the whole top crust
  • Sprinkle with Coconut Sugar
  • Make 3 slits in the top of the pie for steam to escape
  • Place on a foil lined cookie sheet
  • Make a cuff of foil to go around the edge of the pie (this prevents burning)and put into the oven on the center rack.
After the pie has baked for 30 minutes at 400, reduce the heat to 350 and bake another 30-40 minutes, until the crust is golden. Remove and cool. Allow the pie to rest for at least 40 minutes before slicing.

Thursday, June 6, 2013

Big Daddy Does Pho


Big Daddy Does Pho


Pho 3
Big Daddy makes a few cooking attempts to ease my busy schedule. Last night he hit a homerun. Pho (pronounced FA), the simple (yet complex) Vietnamese Street food charmed him when we lived in Hawaii. He is not one for exotic flavors, so this surprised me a bit. Since then we have been to several restaurants here in Charleston that serve Pho. He decided to make it and it was an astounding winner. We paired it with a Belgian Ale and that was a fantastic match too. We had some leftover rare beef (tri-tip) so he froze it and sliced it thinly. I usually ask for my meat on the side when ordering Pho in restaurants, I don’t like it over cooked. We have enough broth for at least two more meals.
ready for soup
Pho 
INGREDIENTS:
Soup
4 quarts beef stock (homemade is best)
1 large onion, sliced into rings
6 slices fresh ginger root or galangal if you can get it
2 small stalks of fresh lemon grass tied in a knot
1 pound sirloin tip, cut into thin slices
1 (8 ounce) packages dried rice noodles
Garnishes and Sauces
1/2 pound bean sprouts
1 cup fresh Thai basil leaves
1 cup fresh mint leaves
1 cup loosely packed cilantro leaves
3 fresh jalapeno peppers, sliced into thin rings
2 limes, cut into wedges
Hoisin sauce
Sriracha (Rooster) sauce
Fish sauce
METHOD :
1.In a large soup pot, combine broth, onion, ginger, lemon grass, star anise, cinnamon, and peppercorns. Bring to a boil, reduce heat, and cover. Simmer for 1 hour.
2.Arrange bean sprouts, mint, basil, and cilantro on a platter with chilies and lime.
3.Soak the noodles in hot water to cover for 15 minutes or until soft. Drain. Place equal portions of noodles into large soup bowls, and place raw beef on top. Ladle hot broth over noodles and top with beef. Pass garnishes and sauces.
Pho 2

Saturday, May 25, 2013

Pastitsio: Greek Lasagna

Pastitsio: Greek Lasagna

Standard
Tight shot
This recipe is so good that I revisit it every few months. It makes a great centerpiece for a dinner party and the leftovers are better than the first night’s meal. The noodles are difficult to find, but I get them on Amazon.com, buying 6 bags at a time.
Greek Lasagna Pastitsio
When teaching others to make this dish, I have often joked that the word pastitsio (pa-STEE-tsee-oh) translates to “messy kitchen” in Greek. I was only kidding, but there is a hint of truth to that statement. The Greek word pastitsio derives from the Italian pasticcio, which loosely translates to a mess or a hodgepodge.
Three essential components make up this dish – pasta, meat filling, and a creamy bechamel sauce which are layered in a pan and baked to a golden brown. Each stage will require dirtying some pots and pans, but I think you will agree that the end result is well worth the clean up!
Prep Time: 45 minutes
Cook Time: 45 minutes
Total Time: 90 minutes
Ingredients:
  • 1/2 cup olive oil
  • 2 lbs. ground lamb
  • 1 large yellow onion, chopped
  • 1 cup dry white wine
  • 1 14 oz. can tomato puree or sauce
  • 3 tbsp. chopped fresh parsley
  • 1/2 tsp. ground allspice
  • 1 tsp. ground cinnamon
  • 1 1/2 cups grated Parmesan cheese (or Kefalotyri if available)
  • salt and freshly ground black pepper to taste
  • 3 tbsp. breadcrumbs plus 1/2 cup for topping if desired
  • 1 pkg. #2 Macaroni for Pastitsio (500g)- available at Greek or ethnic groceries.
  • 4 egg whites (reserve the yolks for bechamel sauce)
  • 1/2 cup unsalted butter (1 stick)
greek noodles
For the bechamel sauce:
  • 1 cup unsalted butter (2 sticks)
  • 1 cup all purpose flour
  • 1 quart milk, warmed
  • 8 egg yolks, beaten lightly
  • 1/2  of a whole nutmeg, ground
Preparation:
This recipe will yield about 24 servings depending upon the size of your pieces. I use a lasagna pan that is 9 x 13 x 3 inches deep.
Begin with the Meat Filling:
Heat olive oil in a large saute pan. Add ground lamb and cook over medium-high heat until pink color disappears, about 5 minutes. Add onions and cook until they are translucent, about 5 minutes more.
Add wine, tomato sauce, parsley, allspice, cinnamon, salt, and pepper and allow sauce to simmer over low heat for 10 minutes. While sauce is simmering put water on to boil for pasta.
Cook pasta noodles according to package directions and drain well. Rinse noodles in colander under cold water to cool them slightly.
Stir in 3 tbsp. breadcrumbs to meat sauce to absorb excess liquid and remove from heat.
Melt 1/2 cup butter in pasta pot and return cooked noodles to the pot. Stir in beaten egg whites and 1 cup of grated cheese and toss lightly, being careful not to break the noodles.
Brush the bottom and sides of the lasagna pan with olive oil. Layer the bottom with half the pasta noodles and press down so that they are somewhat flat.
Add the meat filling in an even layer to the pasta. Top with remaining pasta noodles and flatten top layer as best you can.
Pre-heat the oven to 350 degrees while you prepare the bechamel sauce.
Bechamel Sauce:
Melt butter in a saucepan over low heat. Using a whisk, add flour to melted butter whisking continuously to make a smooth paste or roux. Allow the flour/butter mixture to cook for a minute but do not allow it to brown.
Add warmed milk to mixture in a steady stream, whisking continuously. Simmer over low heat until it thickens but does not boil.
Remove from heat and stir in beaten egg yolks. Add pinch of nutmeg. If sauce still needs to thicken, return to heat and cook over very low heat while continuing to stir.
Bechamel is thicker than gravy but not quite as thick as pudding. It should be somewhere in between. One way to tell if it is thick enough is to dip your wooden spoon in the sauce and draw your finger across the back of the spoon. If the sauce holds a visible line then it is thick enough.
DSC_0007
Pour the bechamel over the pasta noodles making sure to pour sauce down in to the corners as well. I even pull back th sides of the pasta to let some go down the sides. Sprinkle with remaining 1/2 cup of grated Parmesan cheese and bread crumbs if desired.  Bake in 350 degree oven for approximately 45 minutes or until the top is a nice golden color.
tight shot 2

Monday, February 4, 2013

Perfect French Fries


Perfectly cooked fries
I love French fries. I am constantly seeking a way to make the best ones.  Sometimes I like them thin and crispy, sometimes thick and pillowy light inside (best done by roasting at a high temp.). Most often like Goldilocks, I like them “just right.” That means that they are medium cut fries, a little crispy on the outside and soft on the outside, full of potato flavor, not the grease they were cooked in. I like fries cooked in duck fat, but that is not always something I have an abundance of. Here is the method, it is simple and only requires a large pot (best for keeping splatters contained) a deep thermometer used for frying  or cheese making, a spider (or other mesh spoon to retrieve your fries and some good quality canola oil.  The thermometer is the only thing you may need to go out and buy. Here is an example. You need this because you will need to control the temperature of the oil.
Ingredients:
Russet Potatoes, well washed
Canola Oil at least 3 ” deep
Smoked or Kosher Salt
Method:
  1. Cut the ends off of the potatoes and then the rounded edges. lay flat and cut into 1/2 ” strips. Place in salted water till finished cutting.
  2. Preheat the oil to 250 degrees.
  3. Use either a salad spinner or a dish cloth to completely dry the fries. Once the oil is ready place fries into the oil. You should not be crowding them, you may need to do this in batches.
  4. Cook until they start to look slightly golden, about 4 minutes, making sure that the oil temperature stays at 250.
  5. Carefully remove to a straining tray (cookie sheet or steam pan) with a rack.  I say carefully because the potatoes are very tender at this point and can easily tear.
  6. Bring the heat of the oil to 365 degrees.
  7. Add the potatoes in batches and allow to cook till they are perfectly golden with a subtle  bit of brown on the edges. Remove to the draining tray again and salt IMMEDIATELY. Serve right away with home made mayonnaise, BBQ sauce or ketchup.
Burger and fries

Thursday, January 31, 2013

Lemon Focaccia


baked
It is Meyer Lemon season. I have been in love with Meyer Lemons since I was a little girl. My great grandmother had an ever bearing Meyer. Coming from a citrus family has advantages. I wonder how that 60+ year old tree in Glendora, California  is doing now. I do lots with the lemons on my tree and those I buy to supplement my habit. Here is what I did with some of them yesterday.
Meyer Lemon Focaccia
Ingredients:
Makes 1 focaccia.
  • 1 package (1/4 ounce) instant yeast or 2 1/2 teaspoons if you use bulk
  • 5 cups all-purpose flour, preferably organic
  • 2 1/2 teaspoons sea salt
  • Olive oil, for bowl and baking sheet
  • 1/2 cup mozzarella or pecorino toscano thinly shredded
  • 2 lemons, very thinly sliced crosswise
  • about a tablespoon of fresh rosemary
  • 1-2 meyer lemons sliced thinly and seeded
  • Parmigiano Reggiano cheese to grate over the top
  • 1/4 teaspoon crushed red pepper (more if you like a kick)
  • thinly sliced sweet onion
3-4 tablespoons extra-virgin olive oil (I use smoked)
*Note: It is best to use very fresh lemons for this, as older lemons rinds become difficult to chew.
232323232-fp54384-nu=5376-63;-252-WSNRCG=3489553;72343nu0mrj
Method:
  1. In a large bowl, or in a bowl of a stand mixer, combine yeast and 2 1/2 cups flour with 2 cups water; whisk to combine. Let stand 15 minutes.
  2. Add remaining 2 1/2 cups flour and salt; mix until well combined. Change to the dough hook if using a stand mixer. If using the mixer, knead with the mixer. If doing by hand, turn dough out onto a lightly floured work surface; knead until wet and tacky, but not sticky, 8 to 10 minutes. Transfer to a well-oiled bowl and cover with plastic wrap. Let stand until doubled in size, 3 1/2 to 4 hours.
    rusung
  3. Scatter semolina on a large rimmed baking sheet and press dough evenly into baking sheet. Let rise until puffy, about 1 hour.
  4. Preheat oven to 500 degrees.
  5. “Dimple the dough with your fingers  Drizzle some olive oil on the dough. Cover dough lightly with Pecorino or Mozzarella  and lemon slices, then sprinkle with rosemary and pepper; drizzle with more extra-virgin olive oil. Gate a little Parm over the top.
    dimplesoiled
  6. Transfer to oven and bake for 15 minutes. Rotate baking sheet, and continue baking until lemons and crust are golden brown, about 15 minutes more.
    ready to bake
  7. Remove bread from baking sheet and transfer to a wire rack to cool at least 10 minutes before serving.
    baked 2

Friday, January 25, 2013

Tamales!


Tamale Time

Standard
tamales to steam
I make a big batch of tamales several times a year. Yesterday I made a batch of pork and green chile tamales. They are not at all difficult to make and they freeze really well. They are also easy to re-steam. Here is the recipe, but keep in mind the filling can be any number of things, from chiles and cheese to chicken, pork, crab, beef etc. Once you get the rolling technique down you will be able to make them with anything. I often triple this recipe. This recipe makes about 20 good sized tamales. You can make them smaller if you are using them as an appetizer.
filling and husks
You will need: 
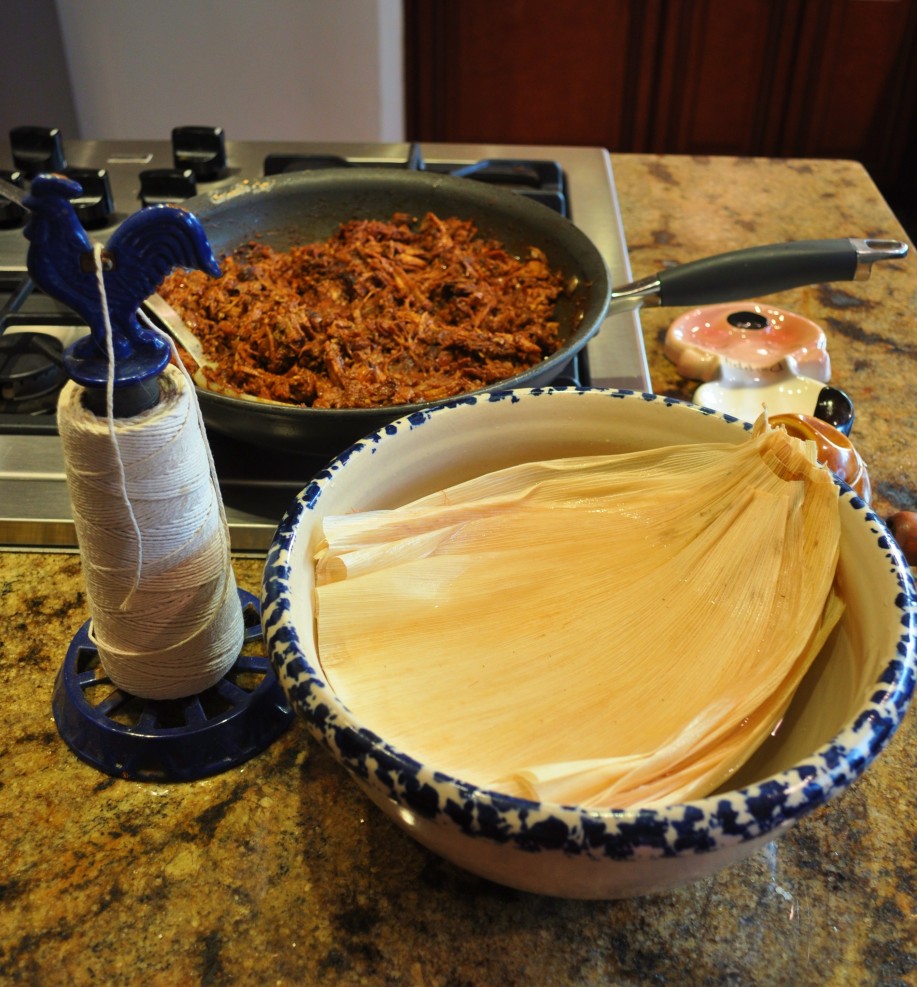
Cornhusks or banana leaves for wrappers
String
4 cups of Masa para tamales (this can be found in the Hispanic aisle of most large grocery stores.
1 1/2 cups of home rendered lard (see here how to do it and why) or butter
4 cups of good stock (I used duck stock, but turkey chicken or veal stock works great)
2 tablespoons of baking powder
1 teaspoon of salt
A large pot fitted for steaming. You need a lot of water for this, so raise your steaming basket to allow for a lot of water. This has to boil for 40-60 minutes.
filling
Filling: 
2 tablespoons lard or olive oil
2 cups of well seasoned shredded pork shoulder (see my recipe here for making smoked braised pork shoulder Latin style).
1 onion finely chopped
6-8 roasted poblano chiles seeded, skinned and chopped into 1/2 inch pieces (or in a pinch you can use canned green chiles)
8 cloves of garlic finely minced
1 tablespoon Vik’s Garlic Fix
1 tablespoon Sweet Onion Sugar
1 teaspoon of smoked salt (I make my own, but you can buy it here)
2 tablespoons of Ancho Chile powder
1/2 cup of stock
queso
2 cups of Queso para Quesedillas, para papusas or Jack cheese grated. Any good melting cheese is fine for this.
sauce
Sauce:
4 tablespoons of masa para tamales
4 tablespoons of house rendered lard or butter
1 cup of New Mexico Red or Green Chile powder
3 cups of good stock
Method
Cut lengths of string long enough to wrap the tamales. There are different ways of folding and wrapping the tamales, but this is my favorite way to do it. You can also tie just the ends or you can fold it so there is one side open and don’t even use strings. If you do this, you must place them upright in your steamer. Some people use parchment paper instead of corn husks or banana leaves.
Soak the corn husks in hot water, weight them down so they are immersed. Just before making the tamales, pour out the water. If you are using banana leaves they need to be heated to soften. I blanch them and place them on a wet towel.
In a stand mixer (or bowl with a beater) whip the cold lard for about 3 minutes on high speed till it is fluffy
In a bowl, combine dry ingredients and stir. Fold that and the stock into the lard. Mix until a very moist (but not sticky) dough forms. Chill for about 20 minutes while you prepare the filling.
masa
In a large skillet melt the lard and add onions. Stir and cook till the onions are translucent, add garlic in a hot spot and stir, then add the chiles and spices and finally deglaze the pan with the stock and allow to simmer till the stock is absorbed, then cool.
Set up a station on a table or counter top. You will need the masa, the cheese, the filling, the string and a platter to stack the finished tamales on.
tamale ready to fold
Start with about 1/2 cup of masa on a corn husk. Fold the sides of the husk where you will want the ends of the tamales to be and spread the masa with the folded husk. Do the same thing with the top and bottom of the husk so that the dough is spread out and you end up with a square of dough about 4″ X 4″. You will need to select the husks that are large enough to accommodate this size of tamale. You should have at least an inch of exposed husk on all sides. Place the filling in the center of the masa and lightly push down on it. Then take the bottom end of the husk and roll it forward to meet the end of the dough. Pull the dough forward making the two ends of dough meet. Then fold in the sides and roll the tamale. Place the string under the tamale and tie like a package. Repeat till you have used all of the dough or filling.
tamale folded
In a steam pot, place the tamales on a rack, cover and boil vigorously for 40-50 minutes. While you are steaming make the sauce.
Chile Sauce:
You can use New Mexico Red or Green Chile powder for this. I used red this time, but my next batch of corn, cheese and chile tamales I am making green sauce.
Make a roux of the masa and lard, stir till slightly brown. Add the chile powder and stir, then whisk in the stock. Allow to simmer and thicken slightly. Keep warm till ready to serve.
To serve, open the husks and remove the tamales to a plate. The masa should be soft and supple, yet firm enough to hold together. Spoon the sauce over and add additional cheese, crema and chopped cilantro. Enjoy!
tamales steamed
tamales plated 2
 Please visit my other blog where this post originated, it is all about Food! www.sassyspoon.wordpress.com